Unit 6: Working with Graphics
Topics covered in this unit
After completing this unit you will:
- be able to describe the terms screen, window, and pixel
- be able to use x-y coordinates to address individual pixels in a window
- be able to use the Processing environment to create simple geometric shapes in a window
- know the hexadecimal-based red-green-blue system for specifying colors
- use
setup()anddraw()methods to create programs with Listener loops - be able to use nested row-column loops to process digital photos
- be able to write an object with a
.move()method to create simple graphical animation
6.0. Overview
We can certainly use the Java language in the context of a text-based console, but it's also possible to leverage the individual pixels on our computer screens. Java has some very powerful graphics capabilities, and this unit introduces some of them.
Let's get started.
6.1.0. Graphics and Java
Java has a powerful set of libraries that are used for graphical displays. One set of libraries, Swing, focuses on Graphical User Interfaces (GUI), with tools for easily displaying buttons and fields of information. If you were to write a calculator application, this is the approach you would use.
There are additional libraries that give you even more control over the pixels on your screen. With this increased power comes increased complexity, and writing Java programs to produce graphical displays can be enormously challenging, especially at this stage in your CS career.
Fortunately for us, much of the complexity of these classes has been nicely encapsulated in various toolkits. For our purposes, for now, we're going to be using the Processing language, which is based on Java and allows us to sketch out some powerful graphical demonstrations in a simple but powerful development environment.
6.1.1. Windows and Pixels
Your computer screen, and windows displayed on our computer screen, are made up of thousands of picture elements, or pixels. These pixels are used to display light of varying color and intensity, and when working with computer graphics (as opposed to a text-based display), you have the ability to control these pixels individually.
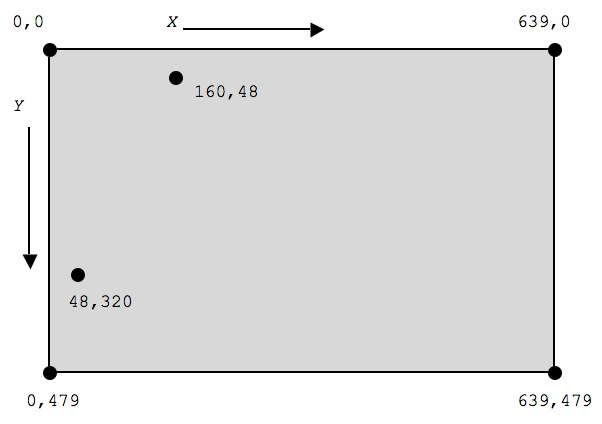
To control these pixels we need to have some way of addressing them individually. Each pixel on the window is identified by its column, row, where the upper-left corner of the screen is 0, 0. For a window that is 640 pixels wide and 480 pixels in height, the lower-right pixel would have the location 639, 479.
The window
The screen or window is a rectangular grid of pixels, each addressed by an x-y pair of coordinates.
X runs across the top of the screen, and is indexed from 0 to the width - 1.
Y runs down the left side of the screen, and is indexed from 0 to the height - 1.
For a 640 x 480 window:
6.2.0. The Processing Environment
Processing is an open-source, Java-based programming language that specializes in allowing one to experiment with creative programs producing graphical results. You can learn more about the language from its website at processing.org and from its Wikipedia article.
Follow the steps below to download and install processing, and begin experimenting with Processor's Integrated Development Environment, the Processor Development Environment (PDE).
6.2.1. Download and install Processing
Download and install Processing by following the instructions at https://processing.org . Processing is open source and cross-platform, so you only need to select the version that is appropriate for your computer.
6.2.2. A Processing program
Once it has been installed on your computer, start up the Processing application. Once you click past the startup window, you should see the main development window on your screen.
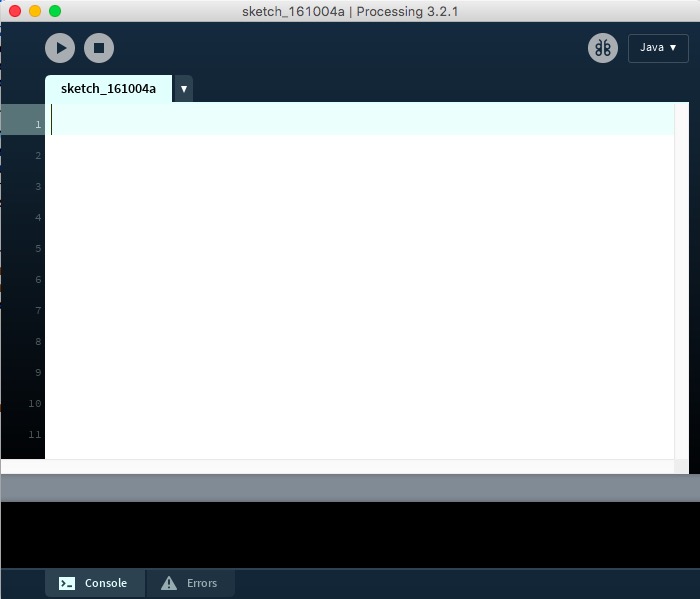
It's in this window that you'll be able to enter Processing commands, run programs, view Console output in the pane below, and view graphical content in a window for that purpose off to the side.
6.2.2.1. Hello, World!
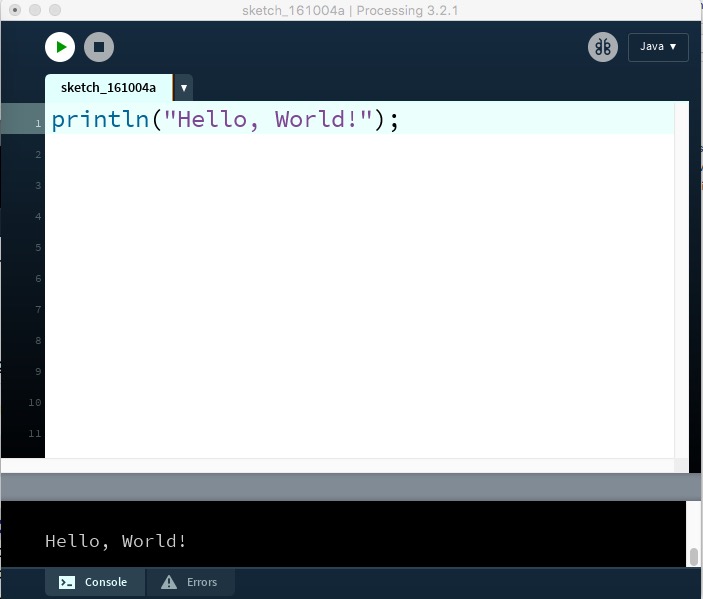
It's a classic program, so we might as well get it out of the way. You don't need to write a main program, however, and you don't need to write a class, and you don't even have to compile the program you're writing. Simply enter this line of code and click on the right-triangle "Run" button.
println("Hello, World!");
Click the Run button and sure enough, the desired announcement appears in the Console pane below.
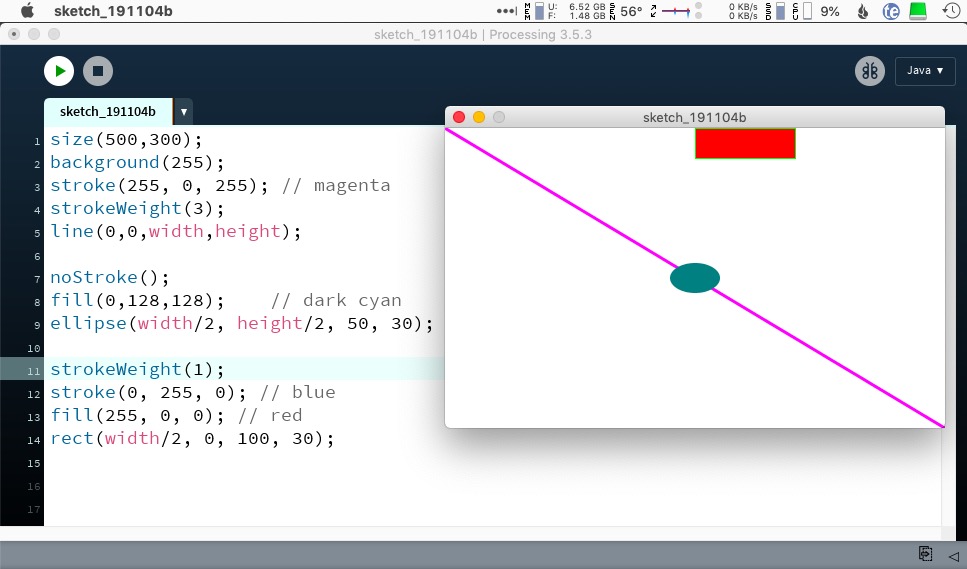
6.2.3. Commands, shapes
There are a number of graphical shapes that you can draw and experiment with. Typically, you'll want to use one of the instructions for defining the width of a line or the fill color that will be used:
background(0-255);            // sets the grayscale color of the background screen
background(0-255, 0-255, 0-255);        // sets the red,green,blue (RGB) color of the background screen
stroke(0-255);          // defines the grayscale color of a line
stroke(r, g, b);        // describes an RGB line color
strokeWeight(thickness);    // describes the thickness of the line
noStroke();             // if you don't want a border on your shapes
fill(0-255);            // describes a grayscale fill color
fill(r, g, b);          // describes an RGB fill color
Then you can use one of the many geometric shapes provided by Processing. Here are a few to begin experimenting with:
ellipse(centerX, centerY, width, height);
point(X, Y);            // highlights a point on the window
triangle(x1, y1, x2, y2, x3, y3);   // creates a triangle with these vertices
quad(...);              // creates a quadrilateral
rect(x, y, width, height);          // creates a rectangle
line(x1, y1, x2, y2);   // creates a line
You can enter these commands into the "sketch" code window in Processing, then hit the Run icon to see what they produce.
6.2.4. Color and Transparency
Color (of light) is different from colors of pigments. The color "red" is electromagnetic radiation of a specific wavelength, like the red light coming from your computer screen, or a stoplight, or the sun at sunset. The pigment red refers to an object with that appearance: an apple has a red pigment, Santa's coat has a red pigment, the red ink on a homework assignment is a red pigment.
As we are discussing light emitted from a display screen in this unit, we'll be referring to these various hues as "colors."
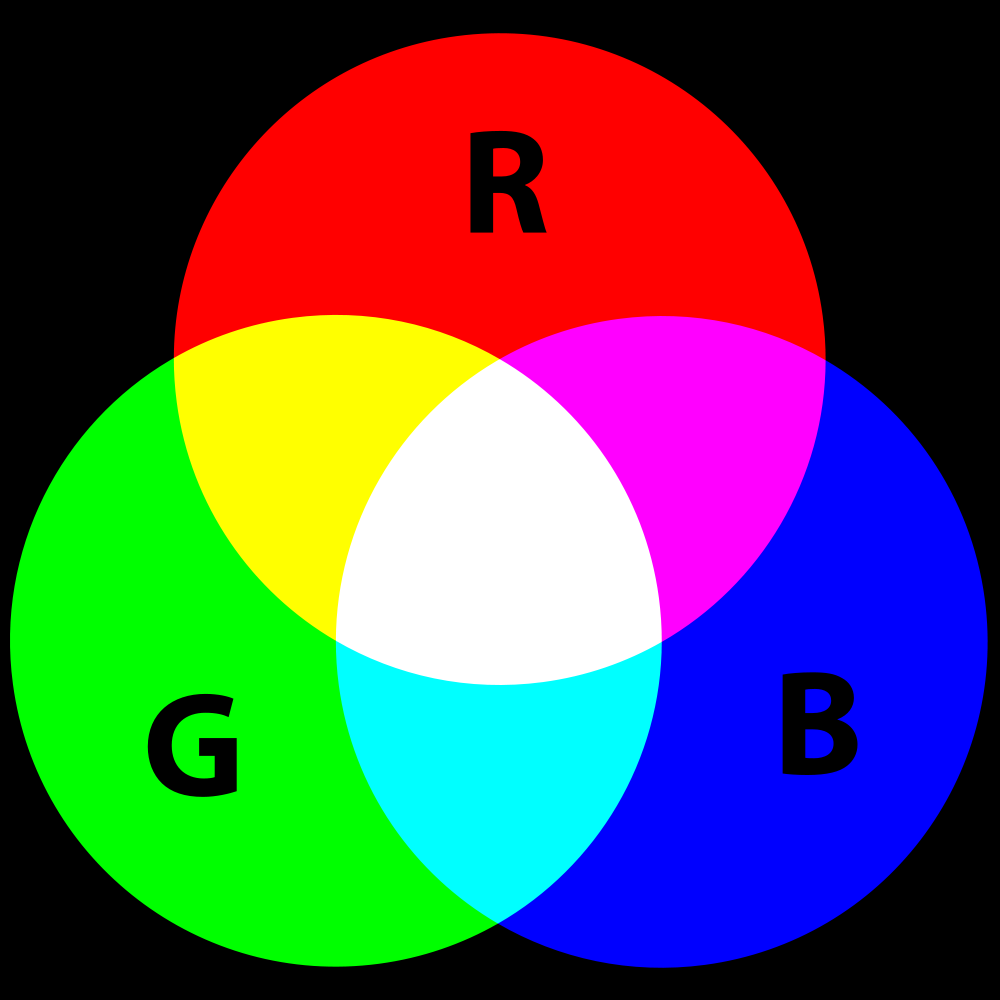
The primary light colors are red, green, and blue, and by combining these colors in varying degrees, all the colors of the rainbow can be produced.
The diagram to the right indicates that red light and green light, when combined, will produce a yellow color. (If you were to combine red and green pigments, on the other hand, you'd have a brown/gray mess.)
To specify different colors for use in your artwork you can indicate how much of each primary color—red, green, and blue—you wish to use, with a value from 0-255.
So, if you want "white" to be the background of your window, you'd use the instruction
background(255, 255, 255) # red, green, and blue values
To specify the color of your ellipse as magenta, just before creating the ellipse you'd use the instruction
fill(255, 0, 255) # all red, no green, all blue = magenta
Take a few moments to try creating different ellipses on different colored backgrounds.
6.2.4.1. The Alpha channel
In addition to specifying to a very precise degree the amount of red, green, and blue light you wish in a color, you can also indicate the transparency of the color. A color with an "alpha channel" (transparency) of 0 will be completely transparent, while a color with an alpha of 255 will be completely opaque.
The alpha channel is specified as an optional fourth parameter with any given color. So,
fill(0, 255, 255, 128)
would indicate a color "cyan" (aqua), that is 50% transparent. Objects drawn beneath this ellipse will be visible, but obscured to some degree by the cyan color on top.
Copy/enter this code into processing, and use the mouse to change the transparency value of the rightmost circle to see what kinds of effects this can produce.
void setup()
{
    size(640, 480);              // screen dimensions
    background(255, 255, 255);   // RGB background
}

void draw()                     // repeats over & over
{
    float transp = map(mouseY, 0, height, 0, 255);     // magic!
    print(transp);               // print transp in console
    fill(255, 0, 255);           // first color is RB = magenta
    ellipse(300, 240, 100, 100); // draw ellipse using magenta
    fill(255, 255, 0, transp);   // change paintbrush to yellow, with transparency
    ellipse(350, 240, 100, 100); // draw yellow ellipse on top of magenta ellipse
}
6.2.5. Save your work
You can always screenshot your work, but it's easier just to have Processing export the file for you.
If you want to save the sketch that you've made, include a
save("drawing.png");
command at the bottom. A graphic image of your window will be saved in the home directory of your sketch, probably inside the directory ~/Processing on your computer.
6.2.6. Listeners
The real strength of Processing comes with it's ability to easily allow for interacting with the code during runtime.
A listener is a bit of code that monitors input devices for activity. A mouse listener tracks the mouse's x- and y- coordinates on the screen, and whether or not any of the mouse's button's have been pressed or released. (We used a mouse listener in the example above.) A keyboard listener constantly checks to see if any keys on the keyboard have been pressed, and if so, which one.
We can write our own Listeners in Java, but the Processing platform includes code that supports listening automatically.
A typical Processing program would consist of two standard methods: the setup() method which establishes some of the initial parameters of the program: window dimensions, background color, etc. (Think of it as a constructor.) The subsequent draw() method, which will (normally) loop repeatedly, executes whatever instructions are given inside that method.
Enter the follow methods and then run the program to see what happens.
void setup()
{
  size(640, 480);       // establishes the size of the graphics window
  background(255, 255, 255);    // Red, Green, Blue values to produce a white background
  smooth();                     // Smoothes the rendering of the graphics
}


void draw()                         // The "draw" method is called repeatedly
{
  fill(255, 0, 0);                  // R, G, B color for red
  ellipse(mouseX, mouseY, 50, 50);  // Draws an ellipse with the upper-left corner at
                                    // the mouse's location, 50 pixels wide and 50 high
}
You can make this program a little more interactive by checking to see what the state of the mousebutton is when the program is running:
void draw()
{
    if (mousePressed)
    {
        fill(0);
    }
    else
    {
        fill(255);
    }
    ellipse(mouseX, mouseY, 80, 80);
}
6.2.7. Incorporating random values
The random(n) method produces a random float value between 0 and n. You can convert that to an int value by casting as needed.
Here's a simple program that demonstrates that idea:
void setup()
{
  size(640, 480);
  background(0);
}

void draw()
{
  float randRed = random(256);
  float randGreen = random(256);
  float randBlue = random(256);
  float randX = random(width);
  float randY = random(height);

  fill(randRed, randGreen, randBlue);
  ellipse(randX, randY,100,100);
}
6.2.8. Working with objects in Processing
Processing uses the Java syntax, but there are some differences between Processing and Java. Processing only uses int and float values, in an effort to minimize computational churn and maximize the speed that a program can run at.
You've already seen that we println() information—there is no System.out.println() in Processing.
You can use objects, of course, and the more complex your project, the more you'll want to write your code as objects.
6.2.8.1. PixelWalker
PixelWalker
Using the Processing platform, write a sketch PixelWalker that uses a RandomWalker() class.
The RandomWalker class
The RandomWalker class tracks the x- and y-coordinates of a walker. It includes
- a constructor with
intparametersxandyto establish the walker's initial position - accessor methods
.getX()and.getY()that return the values of those variables - mutator methods
.setX(int newX)and.setY(int newY)that reset the values of those variables - the
.move()method which causes the walker's position to change, usually by one step in thexorydirection
The PixelWalker class
In Processing, the main program (in this case PixelWalker) has to be the first, leftmost tab in the project. Click on the down-arrow in the tab to create a new tab for additional classes (in this case RandomWalker) that should be included in the project.
The main program in the sketch will include the void setup() method to establish a graphical window and a void draw() loop that displays the walker and its position as long as the walker hasn't returned to the middle of the screen. Consider using separate colors to identify the origin, the walker, and the walker's path as it moves.
Also, print in the console the coordinates of the walker and the number of steps it has taken.
Note that you don't need to set up an explicit loop for this project: the draw() method itself repeats.
6.3. Working with photos
In this section we'll use nested loops to process a real-world object: a digital image.
6.3.1. Nested Loops and Graphics Files
We've talked about the classic nested loop construction, which is especially good for looking at data that's organized in a table format, or by column-row. One classic context for this is photo data, or graphics files in a .jpg or .png format.
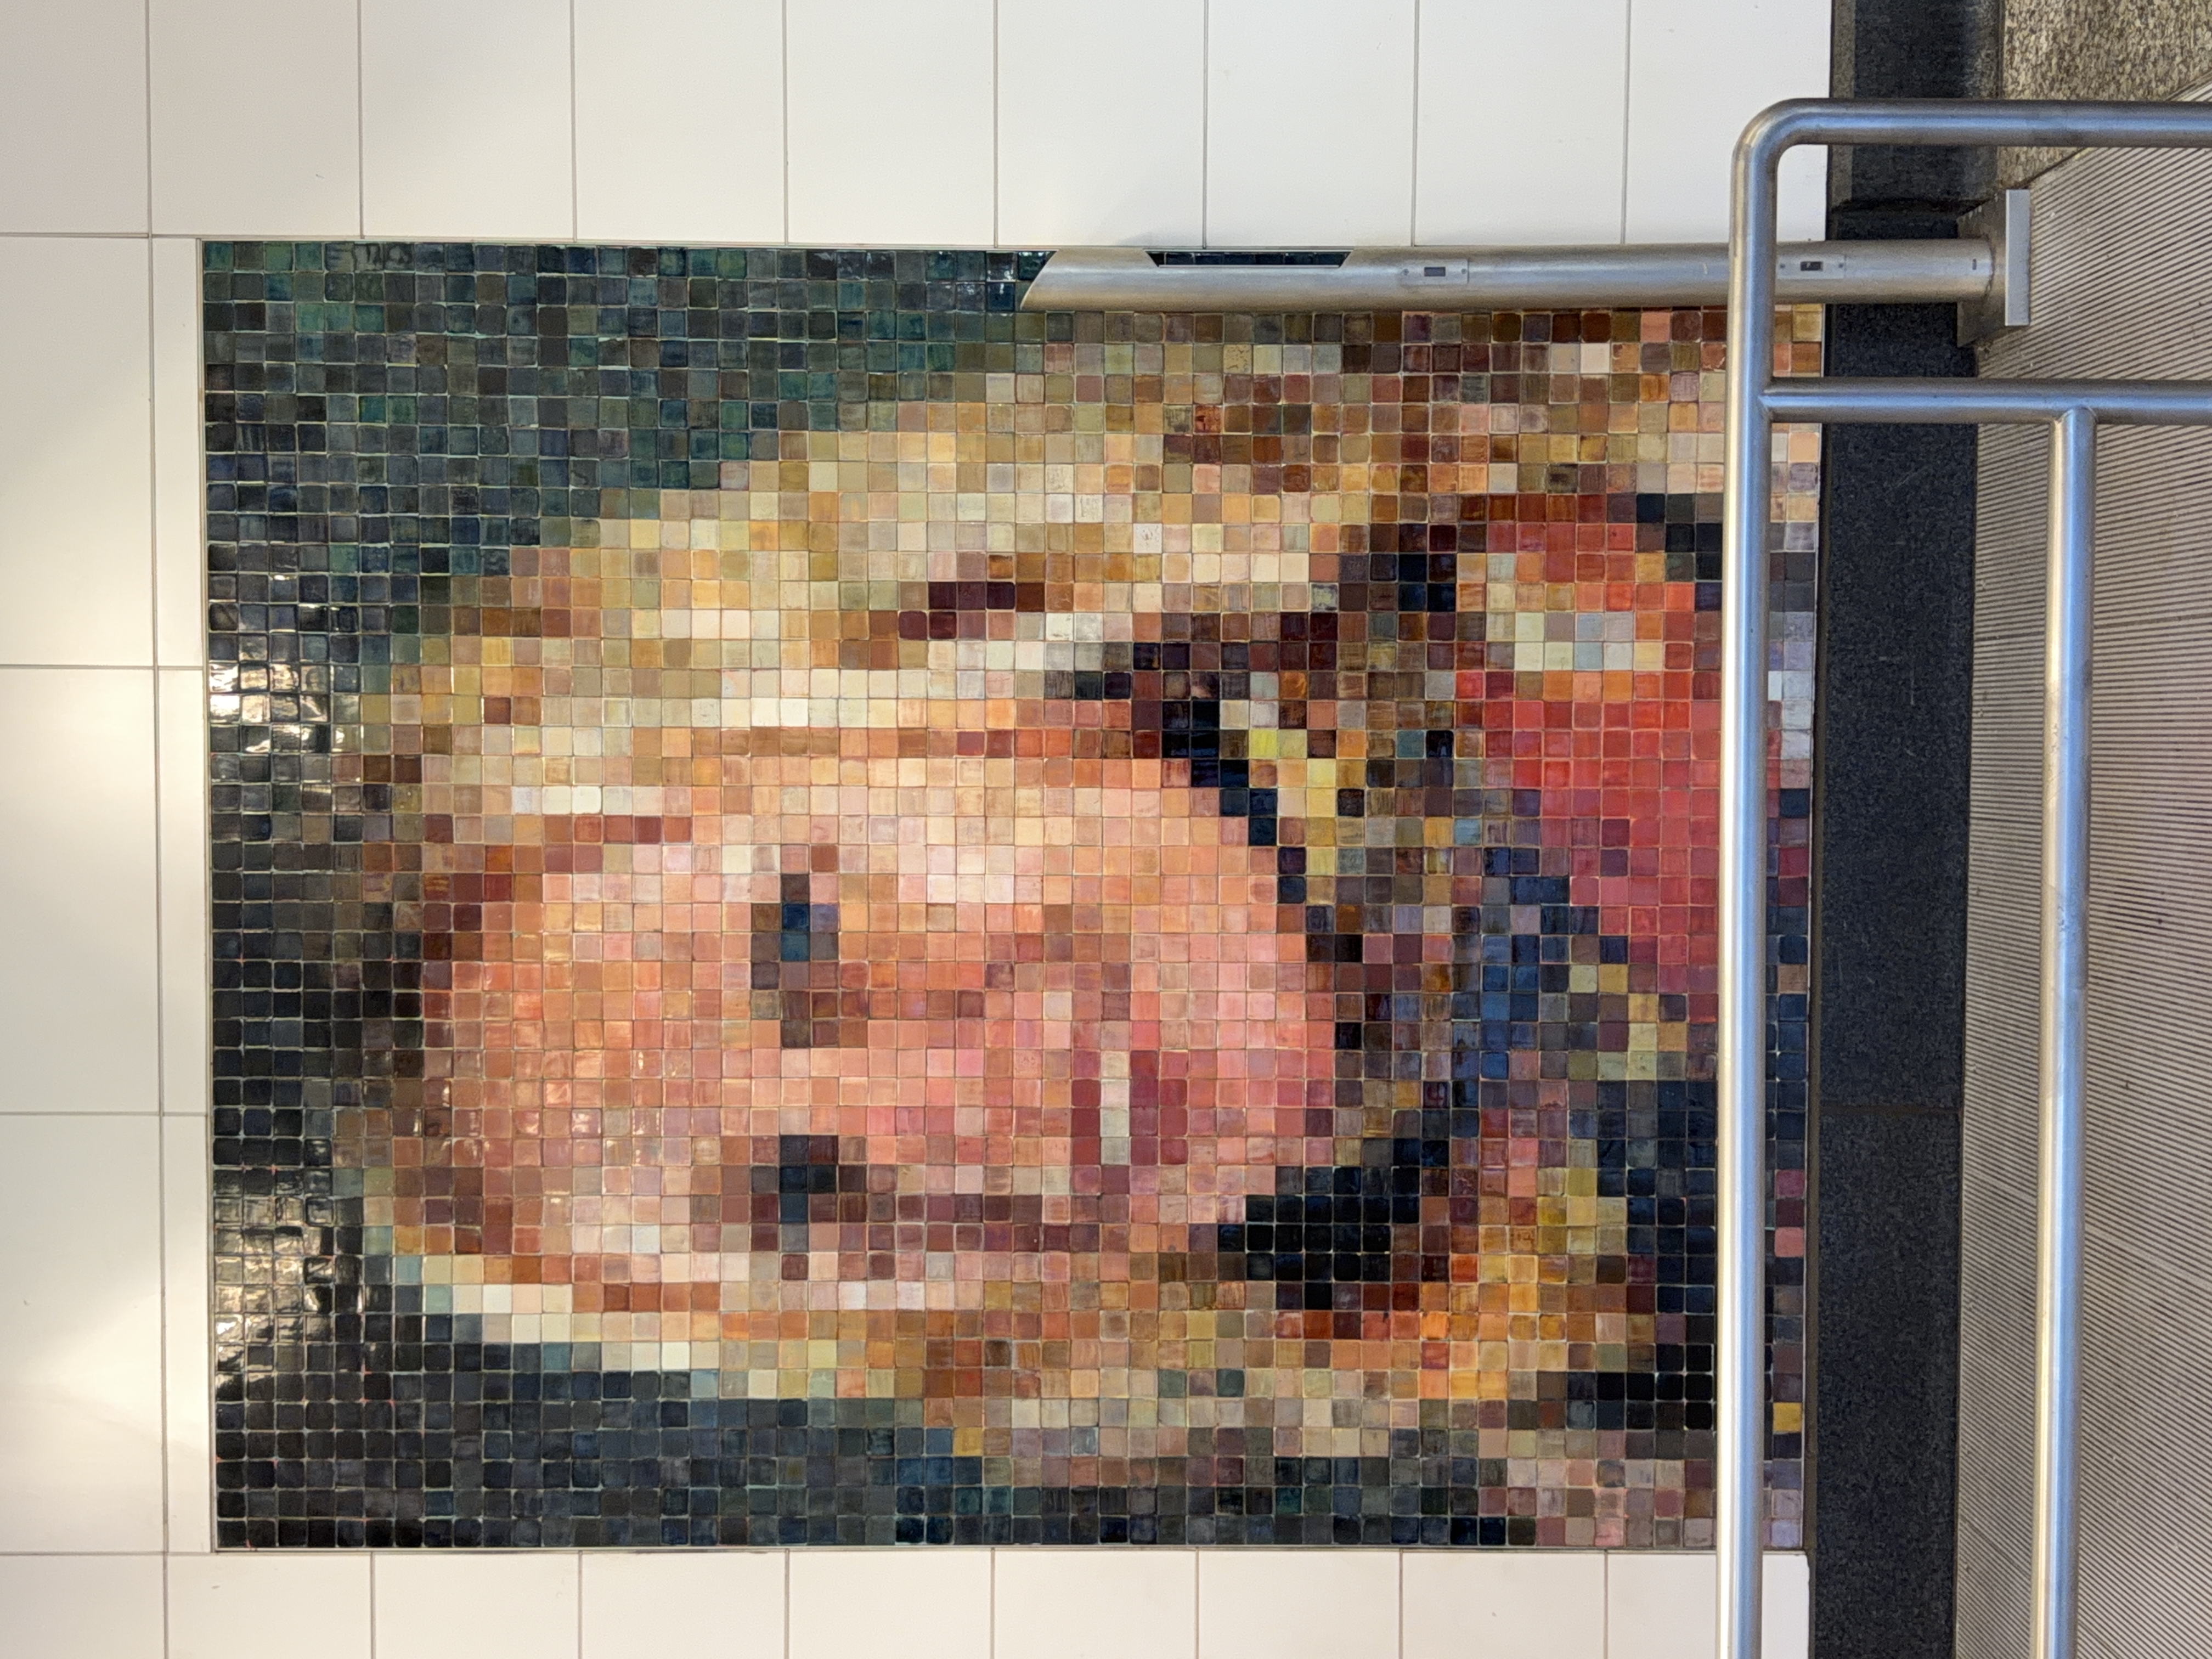
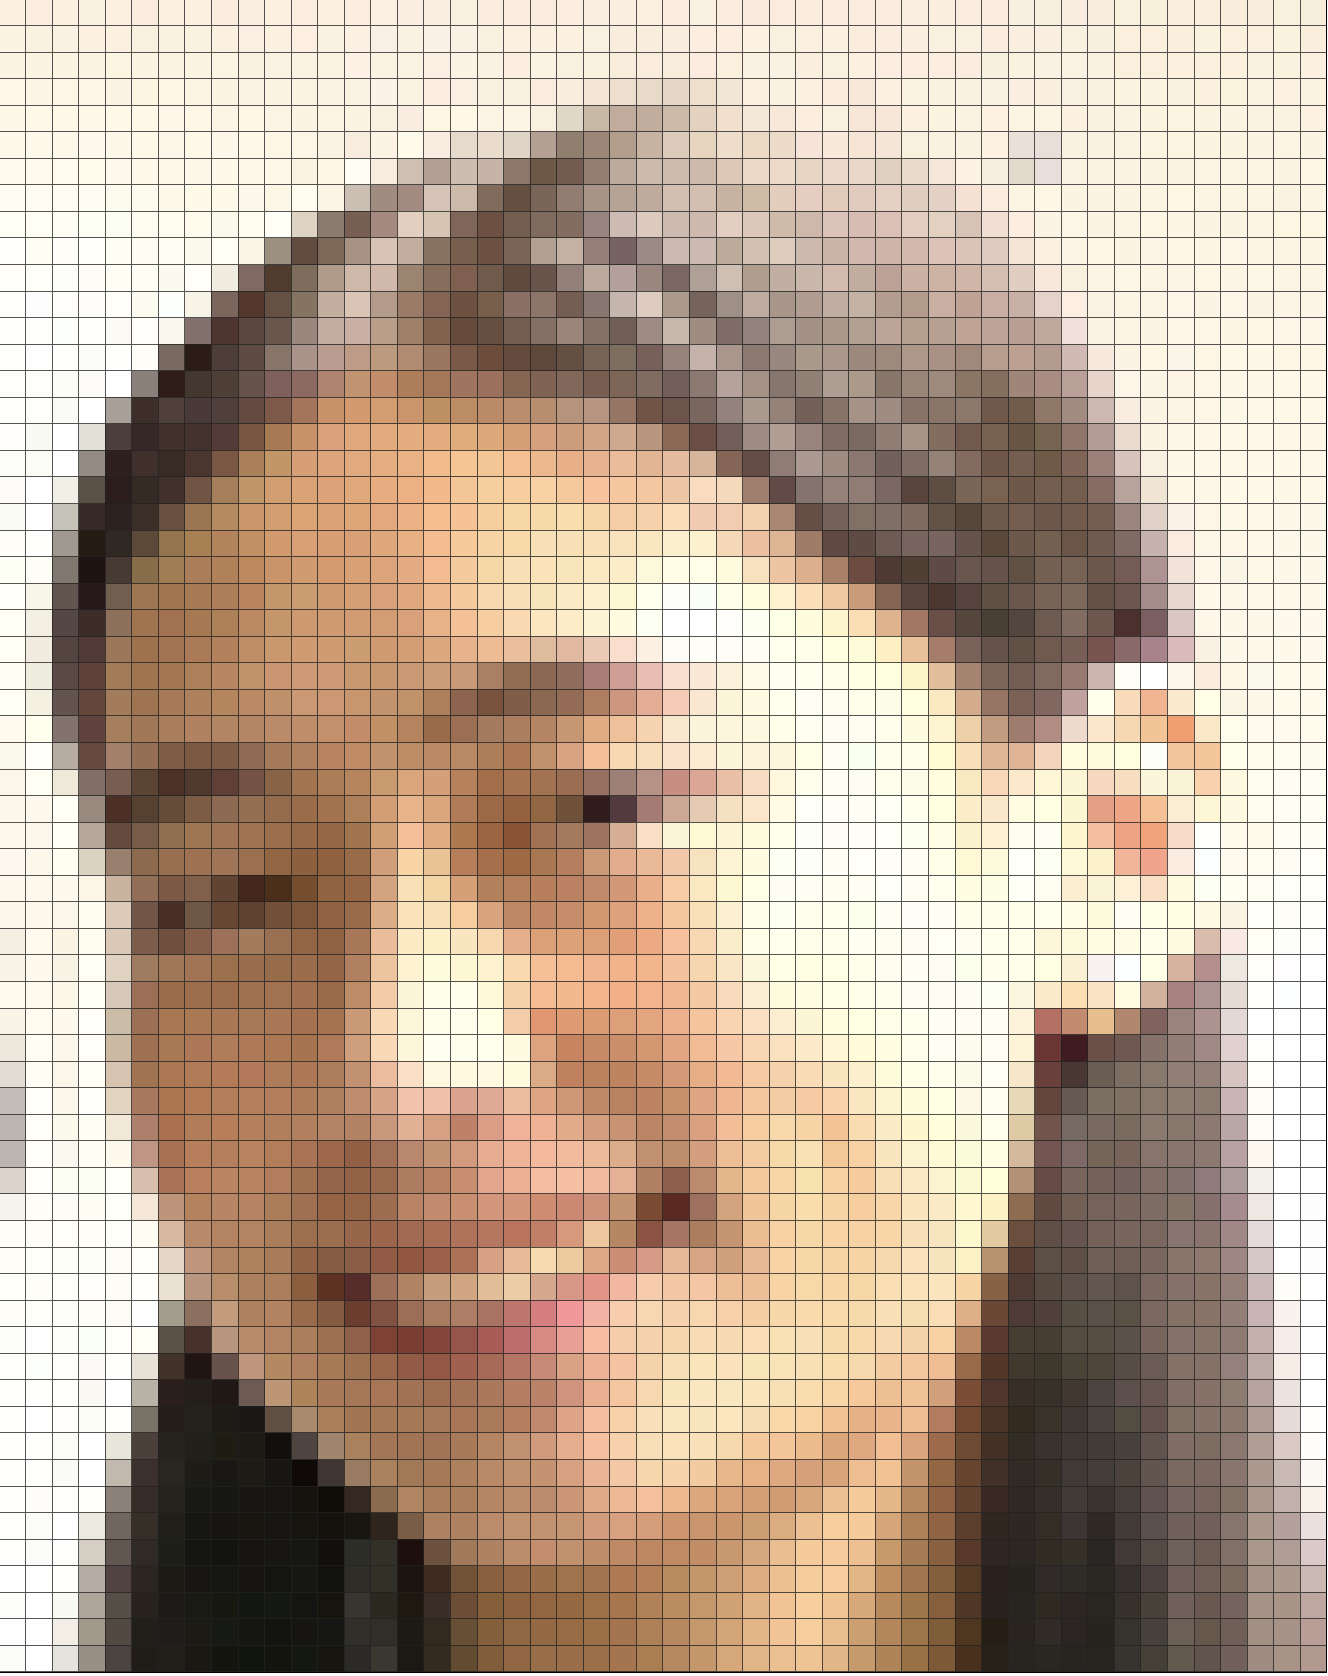
6.3.2. Pixels and Images
Digital images are composed of "picture elements", or pixels, where each pixel in the photo (displayed on screen or printed on paper) is represented by a colored dot.
We'd like to be able to go through a picture pixel-by-pixel, across all the rows and columns of the photo, and get information about the color of that pixel, and (if we're editing the photo) set the color of the pixel.
6.3.3. Colors
Each pixel has a color represented by a series of red, green, and blue values, from 0-255.
Some color combinations:
color(255,0,0)represents the color redcolor(255,255,0)is the color yellowcolor(255,255,255)is whitecolor(127,127,127)is greycolor(0,0,0)is black
6.3.4. Manipulating Digital Images
A digital image is just a digital file with pixels encoded in it. There are lots of different ways that you can read and write these pixels. Java provides support for that, and Processing does as well. Let's use Processing to look at some photos!
Here's a Processing sketch that opens an image, initializes a window on the screen, displays the image in that window, and then uses nested loops to go through the rows and columns of the image to analyze the pixels at each location.
/**
 * This Processing file demonstrates how to read and write colors in a
 * Processing Image (PImage)
 *
 * @author Richard White, based on original code from Dom Rosato
 * @version 2025-11-12
 */

// declare instance variables
PImage img;

/**
 * This method modifies the color values of the pixels in the image
 * based on whatever algorithm is used.
 * In this example, a color image is converted to a grayscale image.
 * param img   a PImage object read in to Processing
 */
public void changePixels(PImage img)
{
    // Go through the rows of pixels in the image
    for(int row = 0; row < height; row++)
    {

        // Go through the columns of pixels in each row
        for(int col = 0; col < width; col++)
        {
            // Get a color object at position col, row
            // Potential source of confusion if using Arrays:
            // Processing refers to pixels in "column-row" order,
            // but a classic Java Array representing this
            // image is row-major, or "row-column" order.
            color c = img.get(col, row);

            // Get individual color "channels" from the color image
            float r = red(c);
            float g = green(c);
            float b = blue(c);

            // Calculate average of these three values
            float gray = (r + g + b) / 3;

            // Create a new color object to replace the old one
            color updated = color(gray, gray, gray);

            // Set the pixel at the given col, row to this updated color value
            img.set(col, row, updated);
        }
    }
}

/**
 * Recall that Processing uses a setup() method to run once and initialize
 * the screen to a given size, and then initialize instance variables.
 * You can identify how big the picture is, and therefore how big to make
 * your image size, but looking at its metadata.
 */
void setup()
{
    // The size of the window should match the size of the image
    // for better visibility
    size(1800, 1200);
    img = loadImage("apcs-perC-small.jpg");

    // Display original image
    image(img, 0, 0);  // 0, 0 refers to placing the image in the
                       // top left of the window
}

/**
 * Recall that Processing uses a draw() method to repeatedly execute a
 * series of instructions. Here, we don't need to keep redrawing the image,
 * so we're going to put a `noLoop();` instruction at the end, which causes
 * the program to stop running.
 */
void draw()
{
    // Call the method to go through and modify the pixels
    changePixels(img);

    // Display the image again, now with its updated pixel colors
    image(img, 0, 0);  //0, 0 refers to placing the image in the top left

    // Save the updated image to the disk for future use (optional)
    // save("edited-picture.jpg");

    // Stop the program
    noLoop();
}
Take a look at the code, then download the project files here. Take a moment to download that zip file, open it up, and place the directory in your code folder.
When you double-click on the PictureDemo.pde file in the folder, the program should launch in processing. Run it to confirm that the original picture is displayed. Then uncomment the lines that display and save the updated version of the picture to see what effect the upVals() method has had.
6.3.5 Additional methods
Then proceed to write a series of methods that perform each of these actions.
- Write a function that removes all green values from the image—this is equivalent to preserving the existing red and blue values while setting the green value to 0.
- Write a function that grayscales the image (i.e., renders it in black and white). In order to do this, you can take the average of the red, green and blue values of a single pixel and then set ALL the red, green and blue values to be that same average number.
- Write a function that increases the saturation of an image by a certain scale factor. All of the RGB values should be multiplied by the given scale factor (such as 1.2 or 2.3)—this effectively creates a brighter image. You may end up with values greater than 255 for your RGB values—this is ok to input in the color object, as it will just default it to 255 (the max).
- Write a function that looks at each pixel and changes the RGB value to only be the largest between red, green and blue (setting the remaining two colors to 0). You should get your original image rendered to look like it was done just in the primary colors.
- Write a function that reflects the left-half of the image onto the right half. An example is shown below. (Hint: you should cut one of your loops in half—where should you set the color at (x, y) to be?)
- Write a function that reflects the image completely (i.e., swaps the left and right halves). How can you modify the previous function in order to achieve the desired result?
- Come up with a modification of your own to the image! You could alter the color values or create a reflection/mirror effect like before.
6.3.6. Blur.java
For this activity, we need to go through the pixels in the image one by one, and change the value of a pixel based on the value of the pixels around it. We'll need to bring the value of this pixel closer to the ones around it.
We're going to need to create new pixels but not actually change them on our current photo. (Why? Changing pixel i,j, will cause a change in the value of i+1, j, which causes a change in i + 2, j... ) We need a blur effect based on just the local values, not a bleed effect, where one pixel in the upper left corner ends up influencing every other pixel on the screen.
To make a blank image, say img2, in Processing:
PImage img2 = new PImage(width, height); // where width and height are determined by the size of the screen
There are some really interesting things to think about in this challenge, with even more nested loops.
6.3.6.1. Getting rid of Magic Numbers
If you've used Photoshop, or GIMP (the Free, Open Source Software alternative), you know that you can vary the level of blur applied to a photo.
What numbers in our current program affect the degree of blur in our new photo?
Replace those numbers with a variable called `BLUR_FACTOR` that is established as a constant at the beginning of the program:
final static int BLUR_FACTOR = 2
6.4. Processing: Animation
The final step in our introduction to computer graphics is more interesting because it's dynamic. We need to introduce some motion to our graphics.
The basic principle of creating the illusion of motion is based on classic animation techniques: the human eye takes a small amount of time to perceive what it sees. If we can change what the eye is seeing (a "frame") more frequently than the rate at which the eye takes in those frames, we'll perceive those distinct frames as motion.
If the frame rate is slower than what we can perceive—a strobe light firing in a dark room while a person dances—we see the frames as separate. If the frame rate is faster than what we can perceive—a video game playing on a computer with a powerful graphics card—we see the frames as representing fluid, continuous motion.
We've already used the Processing platform to draw some simple graphics. We're going to do that again, but this time we'll have them move.
6.4.1. Creating a Ball class
- In a new project in Processing, click the "down triangle" to create create a new tab that will hold describe the
Ballclass. This class is an abstraction that is constructed with a ball'sradius, an initialxandyposition, and an initialvelocityin both the x and y directions. Write appropriate getters and setters for these, as well as a.move(float t)method that mutates x and y based on the ball's change in position during a time periodt. (Physics reminder: for a non-accelerating object,xfinal = xinitial + vxt) - As part of the
Ballclass, also write a.toString()method that returns a string containing information about the ball's current state, ie. the state of all its variables. This will be useful in debugging issues later on.
6.4.2. Creating the main sketch
If you've already written the Ball class, it's time to write the runner program that will use it.
- The main method in the first tab of your Processing "sketch" should set up some initial values and a window that we can use to view our ball, and watch it moving around. This would be a good jumping off point:
/** * This program uses kinematics equations to watch a * ball bounce back and forth horizontally. */ // instance variables Ball b; float time; // establishing the window void setup() { size(800, 600); // creates the window background(255); // background white smooth(); // attempts to remove glitches noStroke(); // no outline on the ball int radius = 30; int vX = 4; // initial values of x- and... int vY = 0; // ... y-velocities time = 0.8; // time interval b = new Ball(radius, width/2, height/2, vX, vY); } // the main draw loop void draw() { background(255); // clear the screen fill(255, 0, 0); // set fill to red for the ball // draw the ball ellipse(b.getX(), b.getY(), b.getRadius() * 2, b.getRadius() * 2); println(b); // displays ball info in console (debugging) } - Run the sketch. It should show the ball in the middle of the screen. You should also be able to read the ball's status in the console window.
- Is the ball moving? Not yet! We have to call the ball's
.move(time)method in thedraw()loop. Add that line and try running the program now.
6.4.3. Collision detection
At this point our ball is animating nicely, but it disappears pretty quickly from the screen. Let's see if we can get it to bounce off the edge of the screen so that it stays within the frame.
- In that
draw()method, right after we've called themove()method, let's check to see if the ball has moved off the screen. If it has, we'll have it change its direction:. . . println(b); b.move(time); if (b.getX() > width) { b.setVx(-1 * b.getVx()); }Does that fix the problem? - It does, partially, but there are two more issues that need to be dealt with now: one is that the ball now flies off the left side of the screen now. We'll need to modify our
ifcondition to address that issue. Go ahead and do that now. - The other is a bit of a detail, but an important one: when the ball is bouncing, say, from the right side of the window, it isn't bouncing when it reaches the right edge—it's bouncing when its center reaches the right side of the screen, and that looks odd. It should bounce not when the center of the ball hits the edge, but when the right side of the ball hits the edge. Where is that right side located, relative to the center? It's
b.getX() + b.getRadius(). Modify theifstatement appropriately. - Finally, make modifications to the sketch so that the ball, with an initial y-velocity, will also bounce off the top and bottom edges of the window.
- Once you've got that working, consider some variations. What if the ball loses energy every time it hits an edge, by having its velocity diminish by 10%? What does that look like? Are there any issues that develop in the process of implementing this variation? ;)
6.4.4. x, v, and... a?
Modify your program so that the ball is subject to a vertical acceleration downwards, just as balls do in the real world. You'll need to modify your ball class so that it is constructed with an acceleration value, and so that its x, y, vX, and vY values are all modified accordingly.